
As perhaps one of the most anticipated features of LymeTools, the Scaffold Feature tool in a "Generate" mode offers some powerful foundational functionality in the automation of CRUD feature development. This feature will create a standard generic feature and then inject code generated from the "Schema Tool" directly into those generic features, doing much of the heavy lifting when it comes to administrative form development.
Instructions for Use:
For more information about what makes up a "generic feature", see the Anatomy of a Feature section. For more information about code that is generated and injected into the generic feature, see the Schema Tool section.
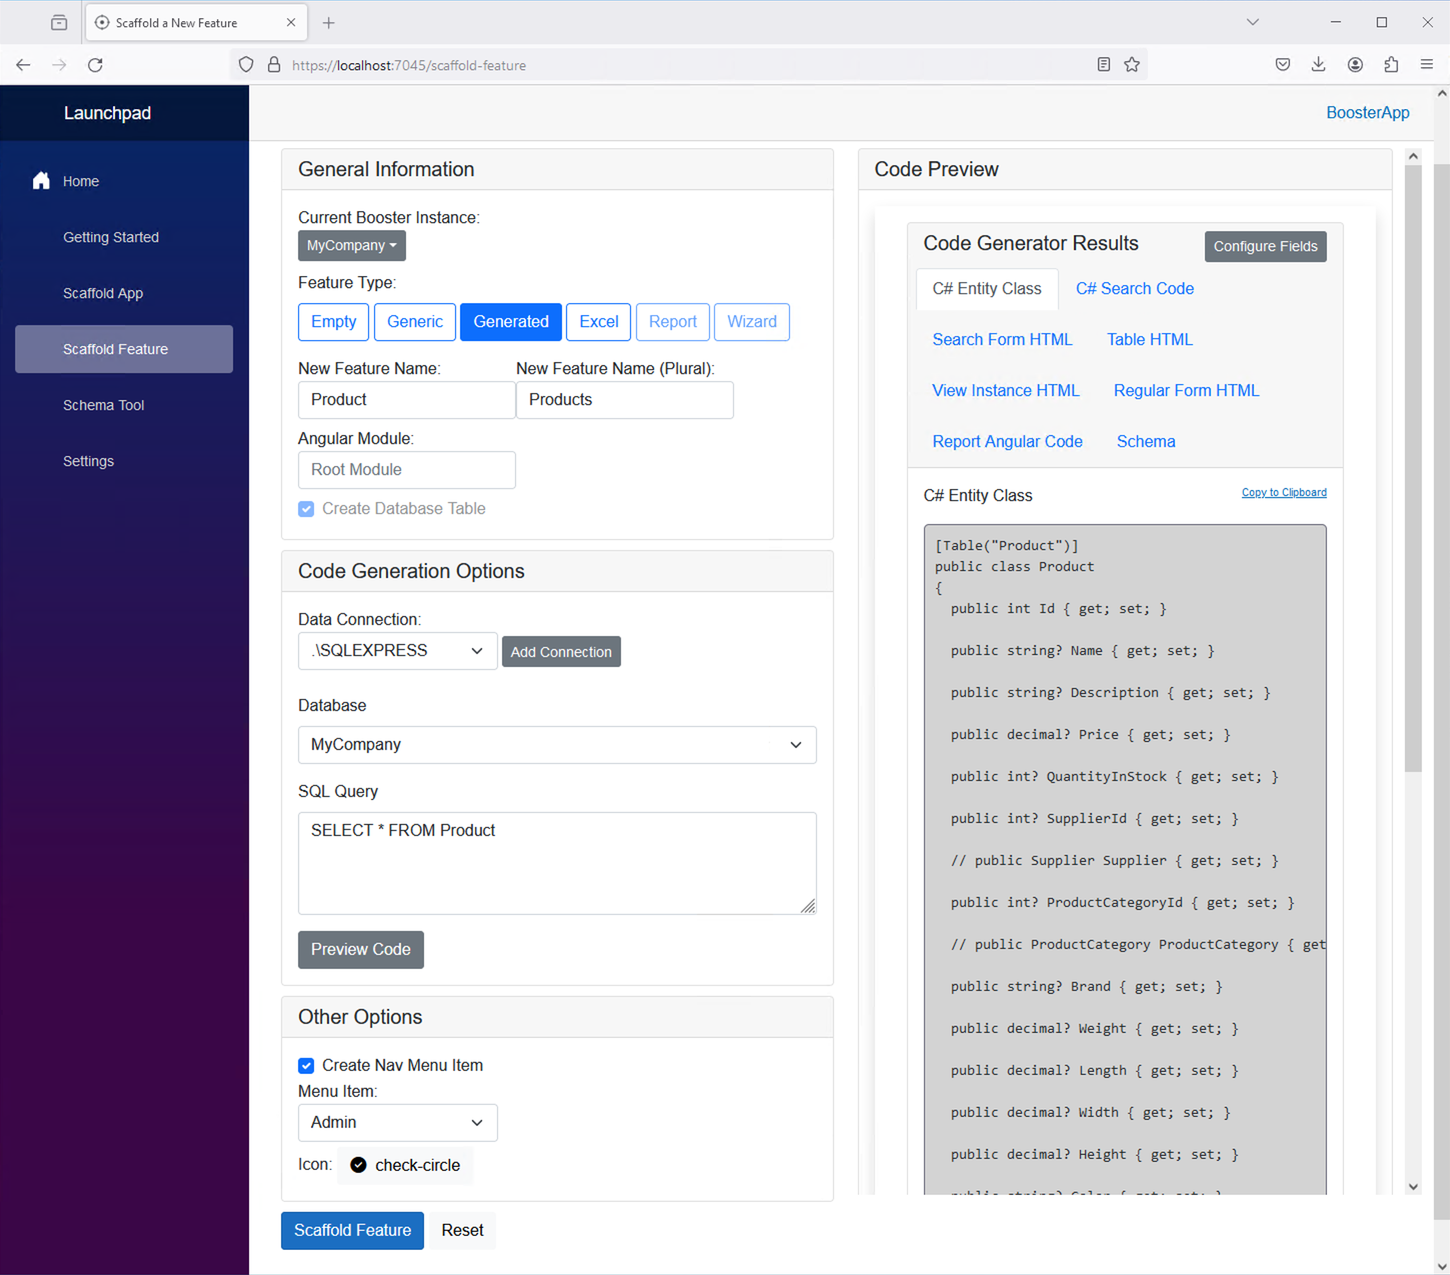
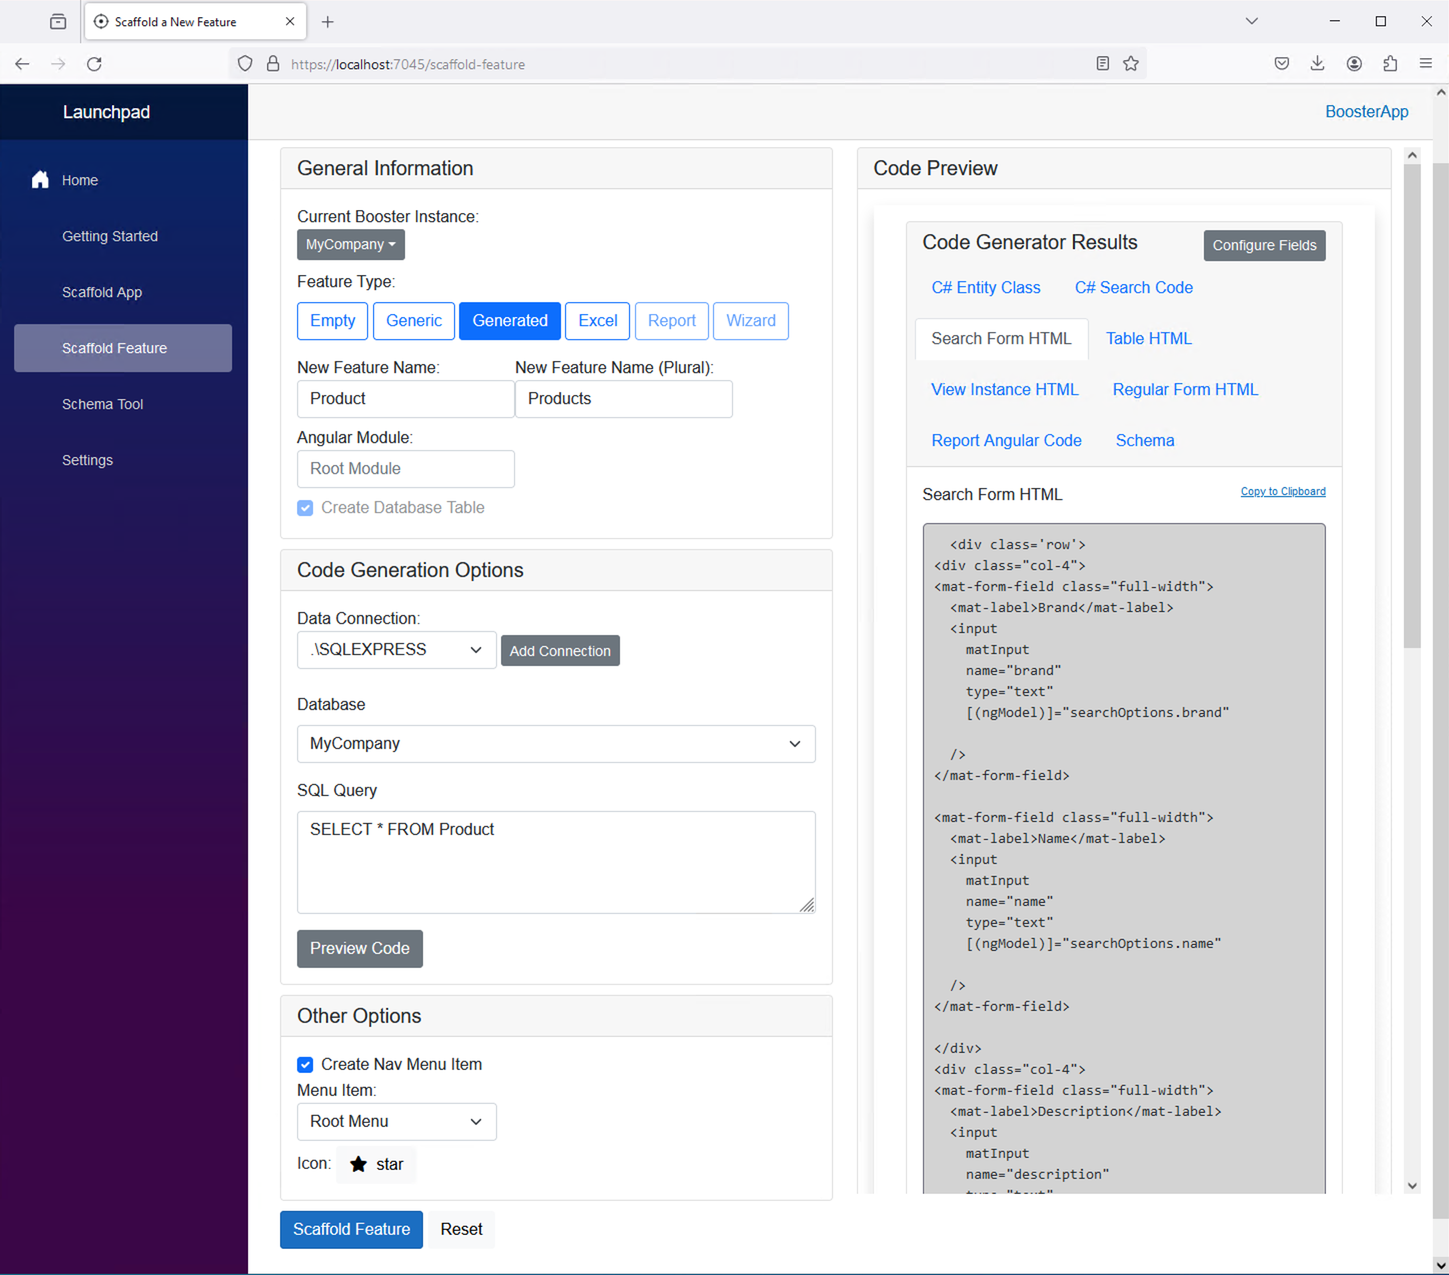
Below is a screenshot of the Scaffold Generated Tool Feature interface prior to pressing the "Preview Code" button. In this example, I am going to generate a feature from a fake table that I have that contains fake product data in a database table called Product. In the screenshot below, I selected the Generated Feature Type and filled in the feature name "Product". Auto-fill populated the rest and is overridable:
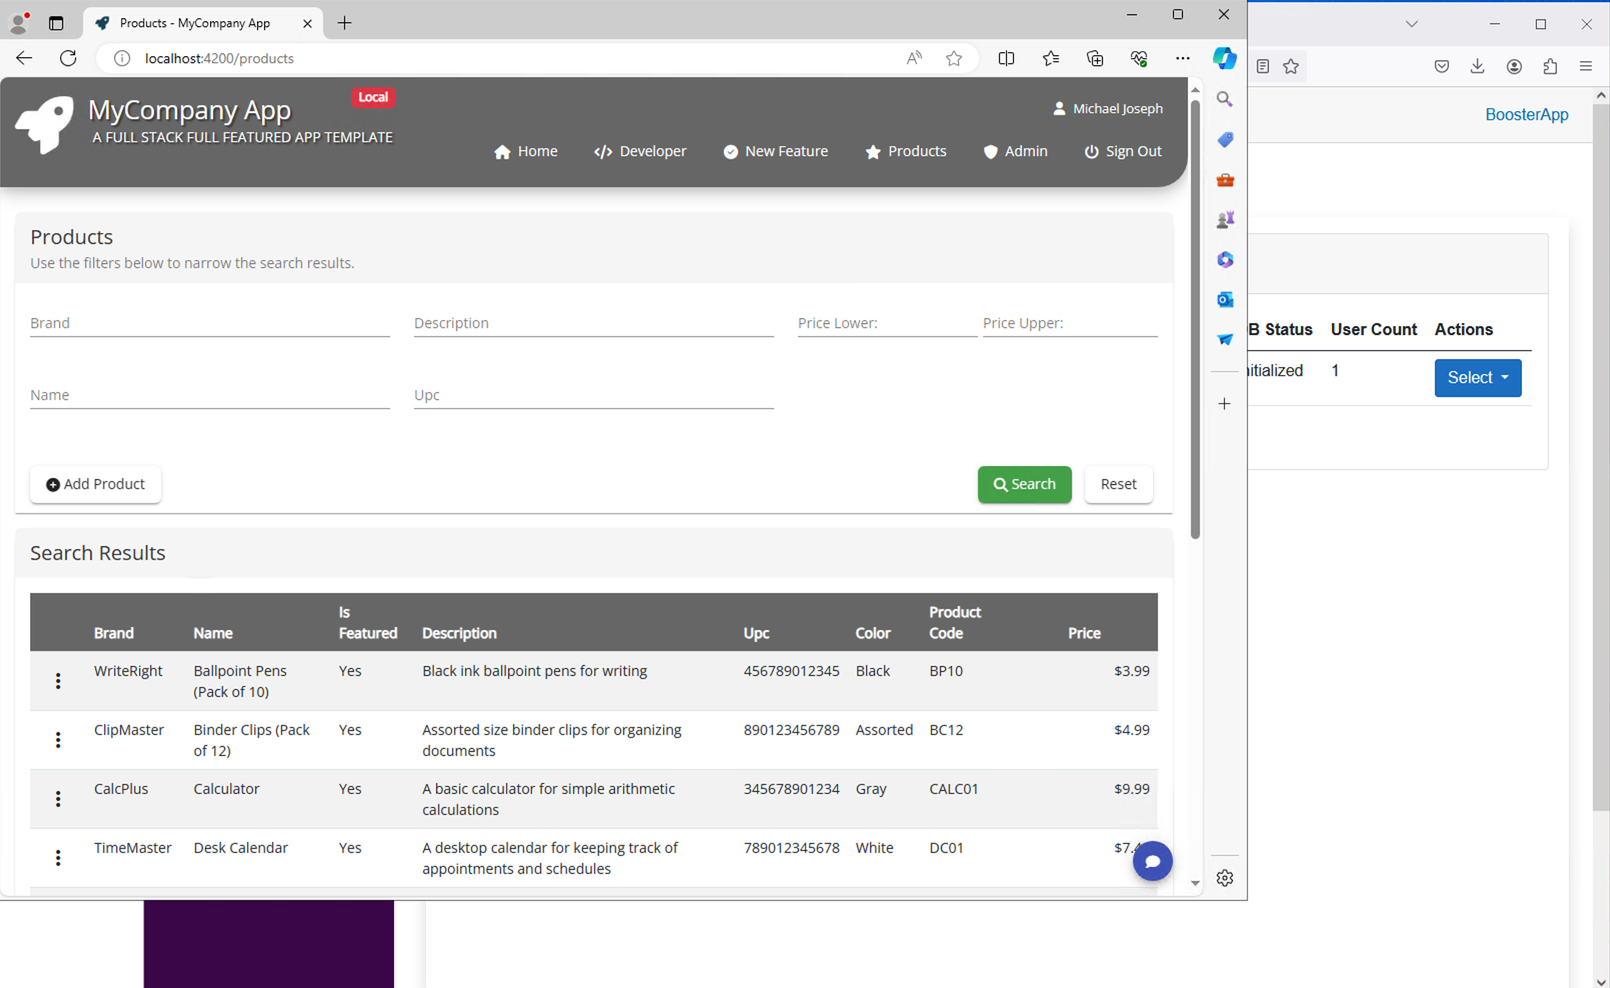
Here's a preview of what the Products table looks like:

After I press the "Preview Code" button, I see the Schema Tool embedded to the right of my main "Scaffold Feature" UI.
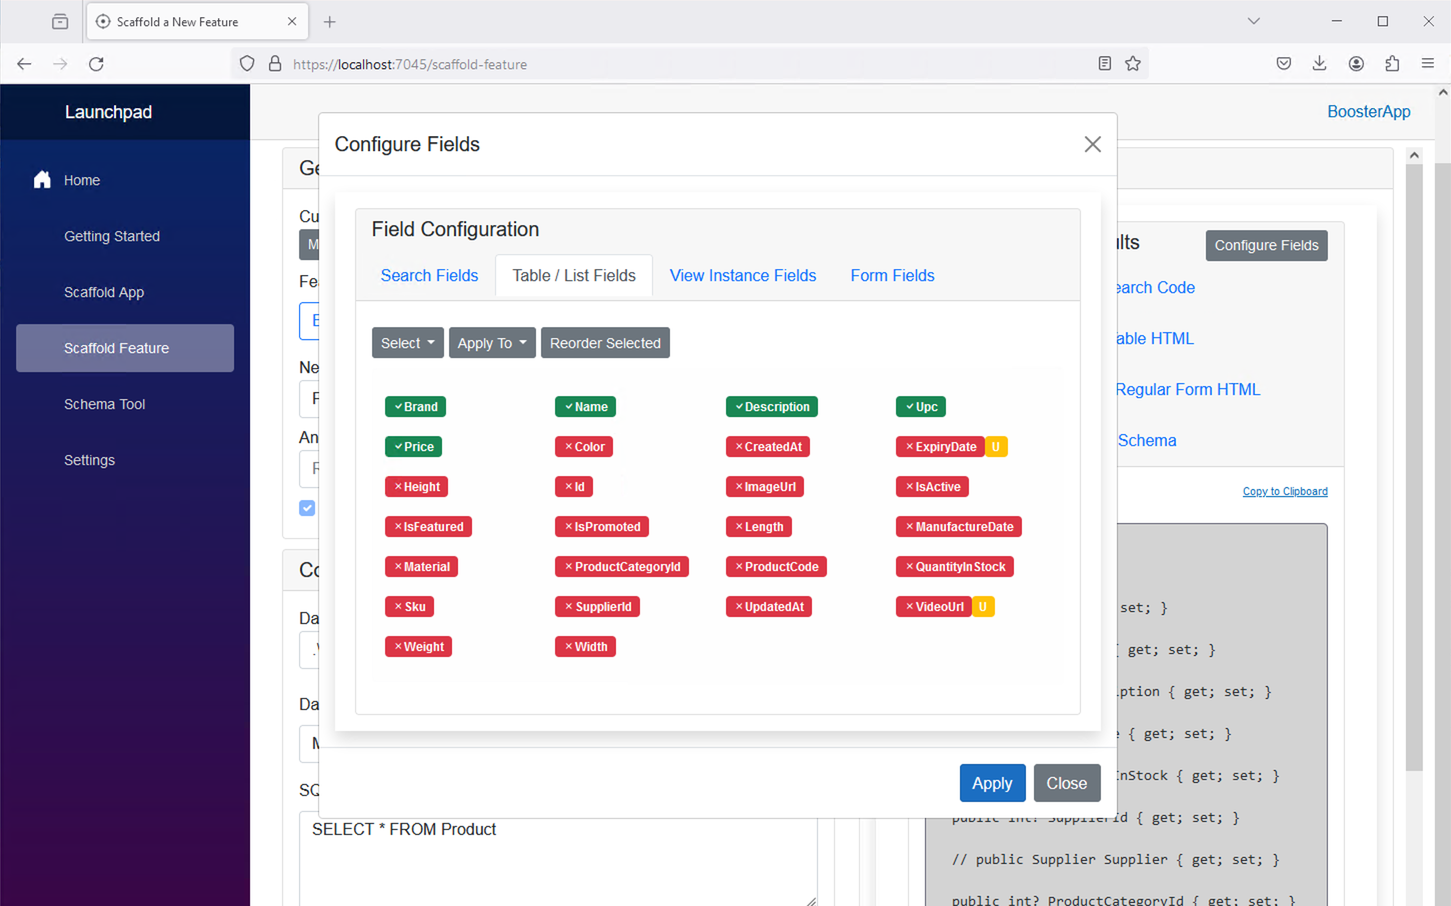
The table is a little large, so I want to limit what fields can be searched by using the "Configure Fields" button. This button will bring up a modal that looks like this:
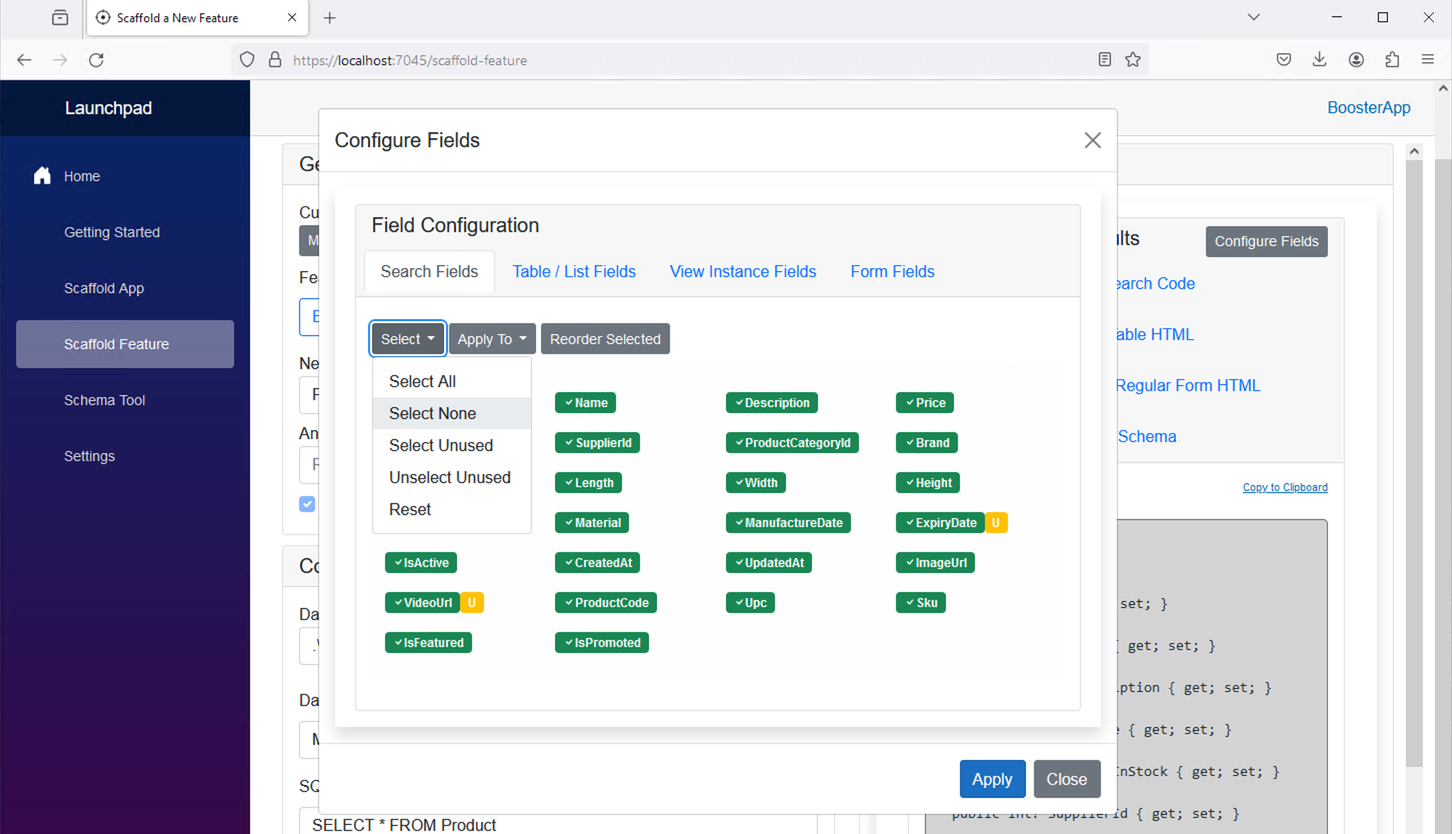
I can pick and choose what fields I want to appear in my search form on the main products page. For this, I will select the "Select None" button and just click the columns I want to include in the search.
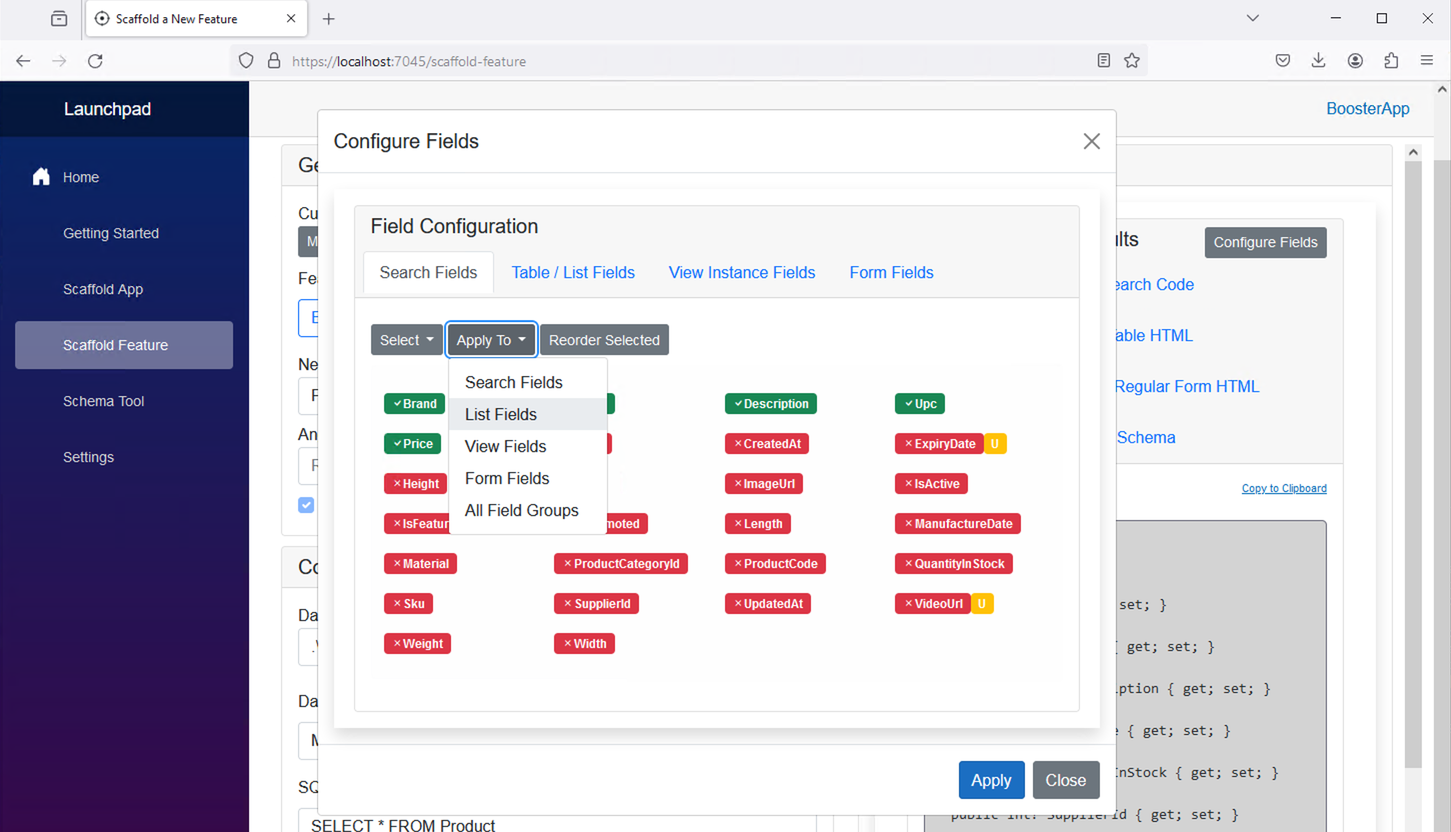
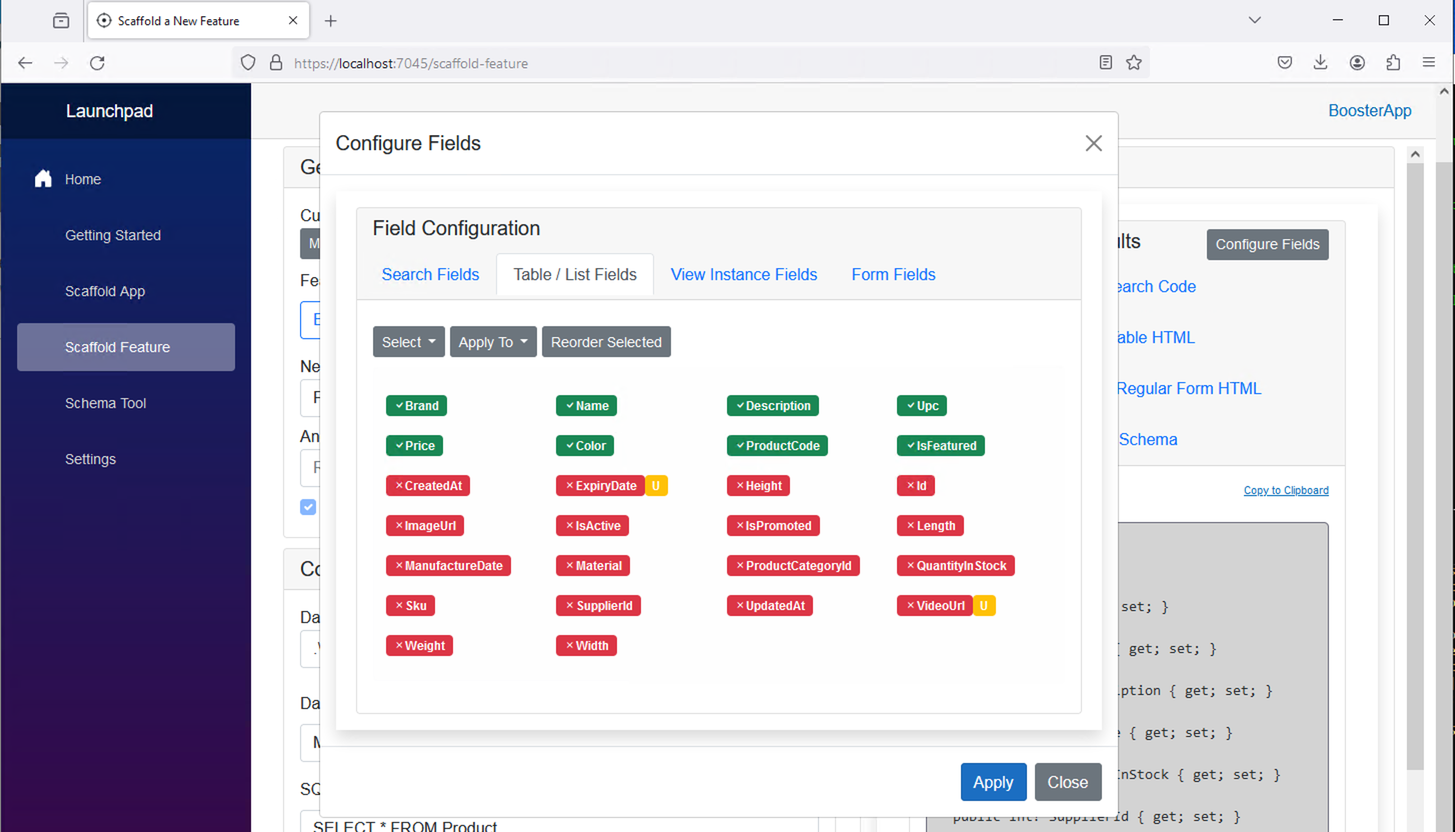
I want all those fields to appear in my "list" view for my entity, so I press the "Apply To" button and select the "List Fields" option:
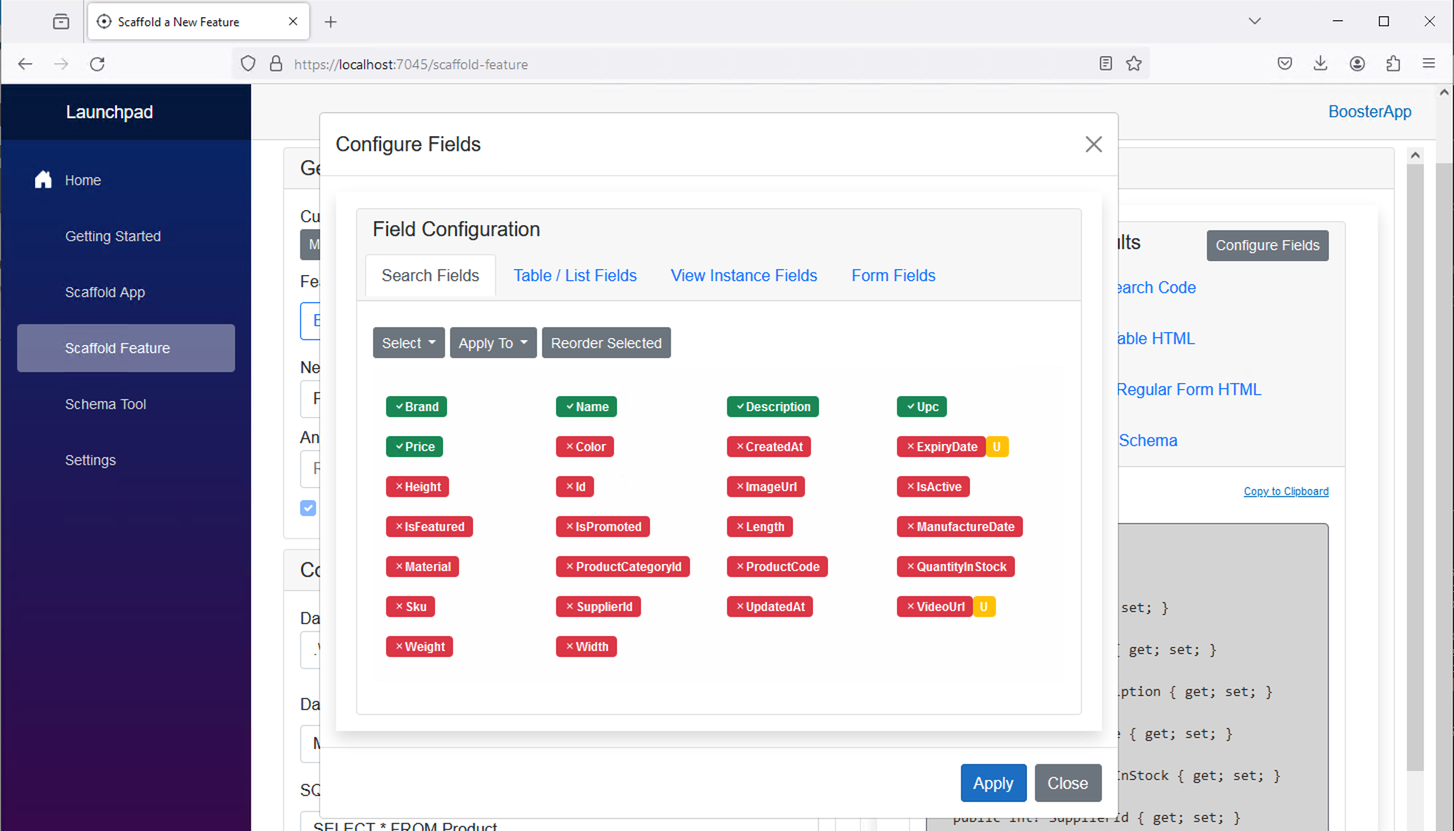
Now, when I click the "Table / List Fields" tab, I'll see the same fields are selected as I selected in the Search Fields tab area:
Then I add a few separate fields that I'd like to add to the list view.
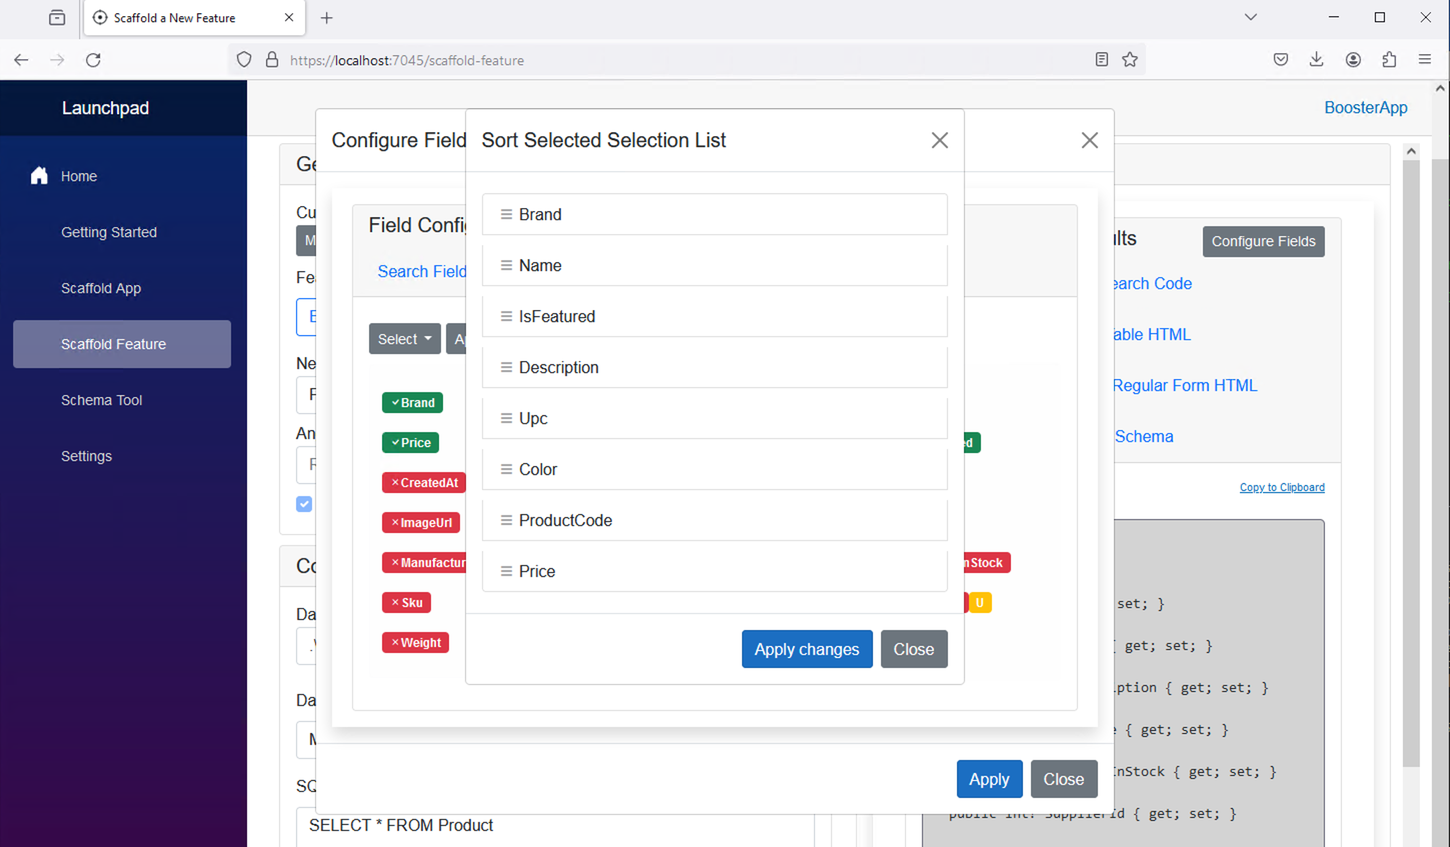
Then re-sort those fields in the list by clicking the "Reorder Selected" button:
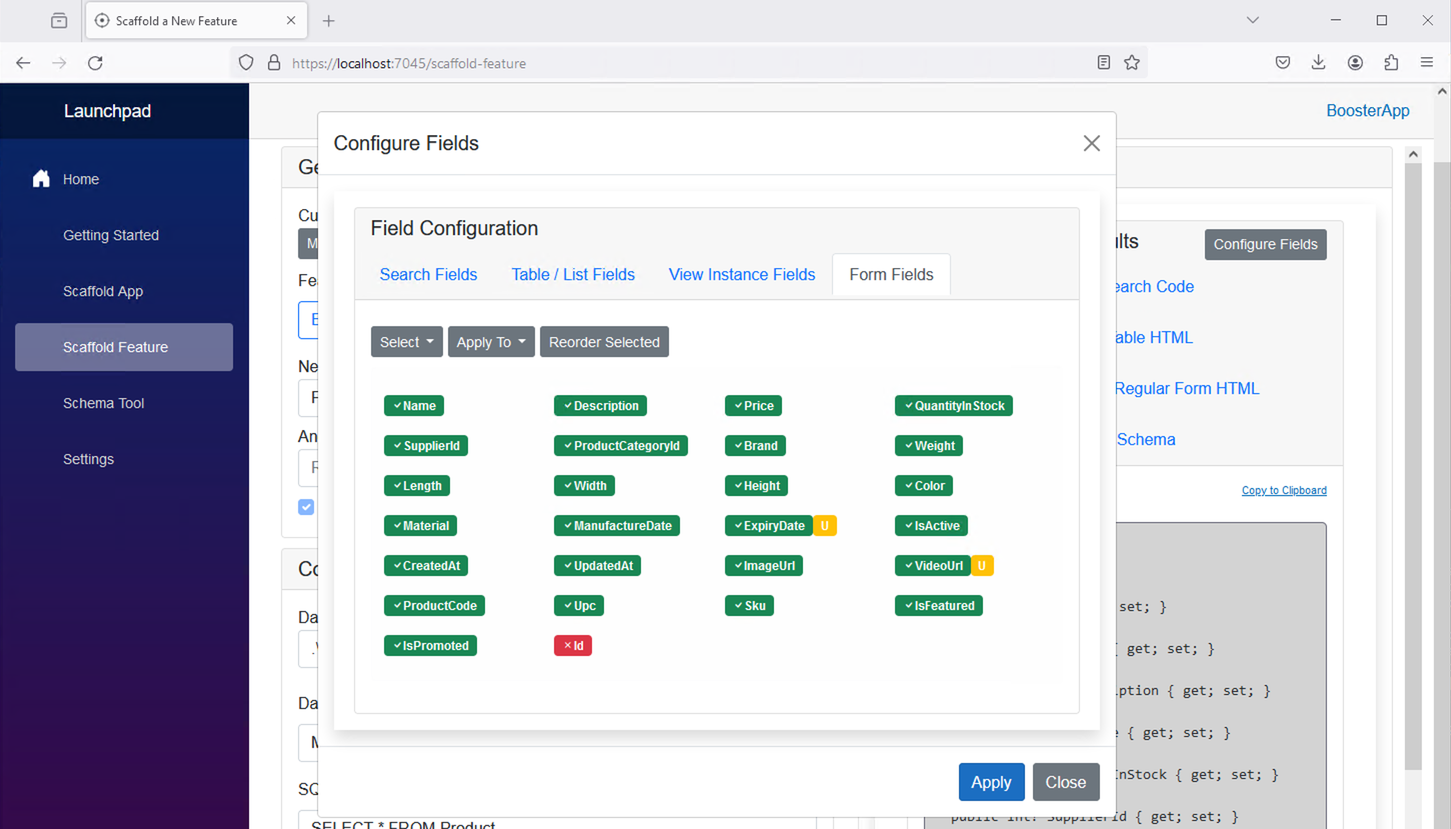
I think that's enough for now, I want all the fields visible on the View and Data Entry Form UI, so I will leave that unmodified, except I will remove the Id field from the data entry form.
I then click "Apply" and I will see the regenerated code preview with the changes visible in the tabs. Here we will look at the Table HTML tab to see the reduced number of fields that match the values configured earlier:
At this point, I'm ready to generate my code. At this time I'll press the "Scaffold Feature" button...
Copying new Angular feature called Product from SampleItems feature in the Main module.
Adding lazy loaded routes to parent module's route file app.routes.ts.
Processing C# Model File Product.cs.
Processing C# SearchOptions File ProductSearchOptions.cs.
Processing C# WebApi Controller File ProductController.cs.
Adding Typescript files to Angular api models folder.
Adding EF Model to DotnetTypegen Export definition '-- MyGenerationSpec.cs'.
Adding DbSet to Data Context file named DataContext.cs.
The table Product already exists in the MyCompany database. (.\SQLEXPRESS) Skipping.
Creating the nav menu item.
Processing Entity Framework Model Class file: Product.cs
Processing Search Options Class file: ProductSearchOptions.cs
Processing Web Api Controller file: ProductController.cs
Processing Angular Data Entry Form file: product-form.component.html
Processing Angular Search Form file: product-search-options.component.html
Processing Angular Table List file: product-list.component.html
Processing Angular View Instance file: product.component.html
Pausing for 5 seconds...
Done!
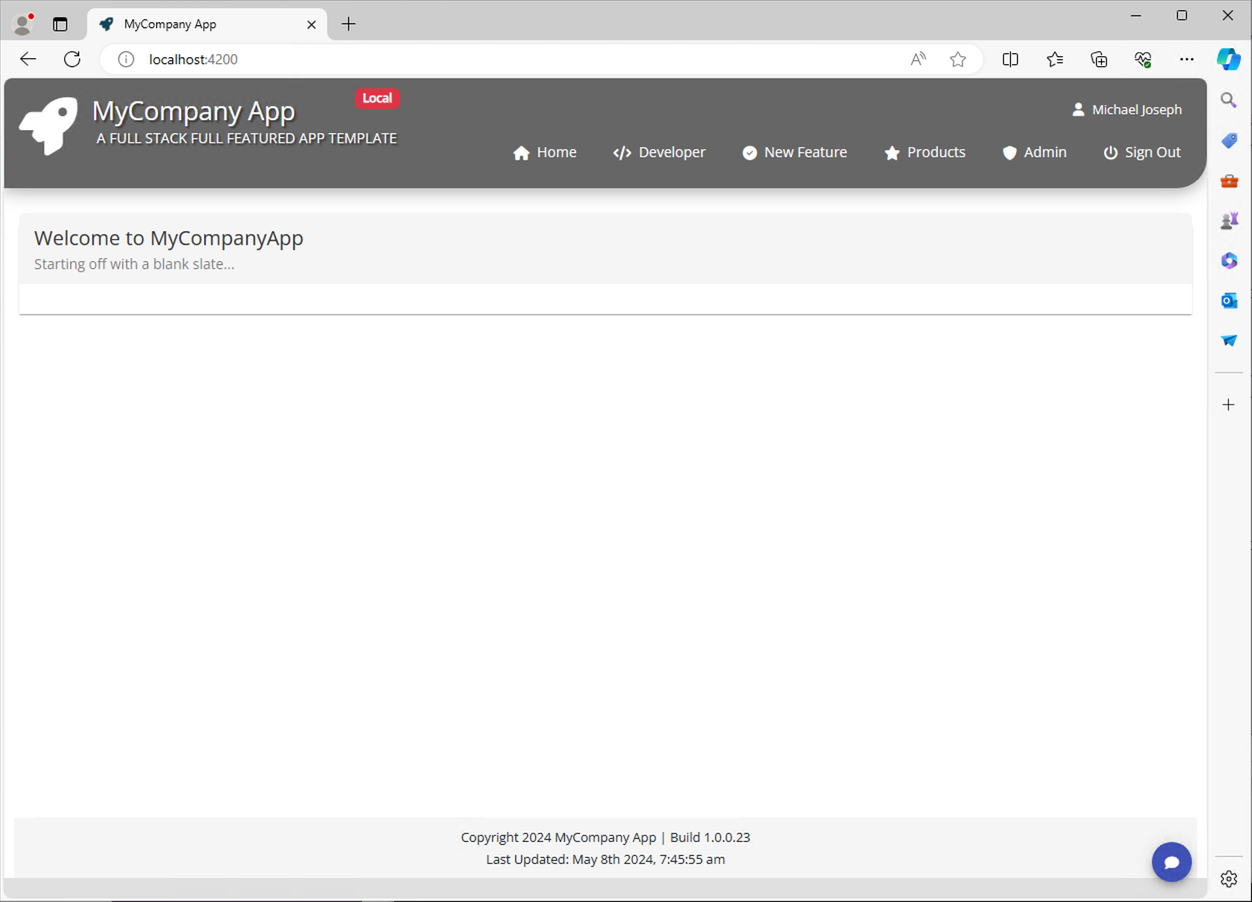
After restarting and running my app, I see a new option on my main navigation menu:
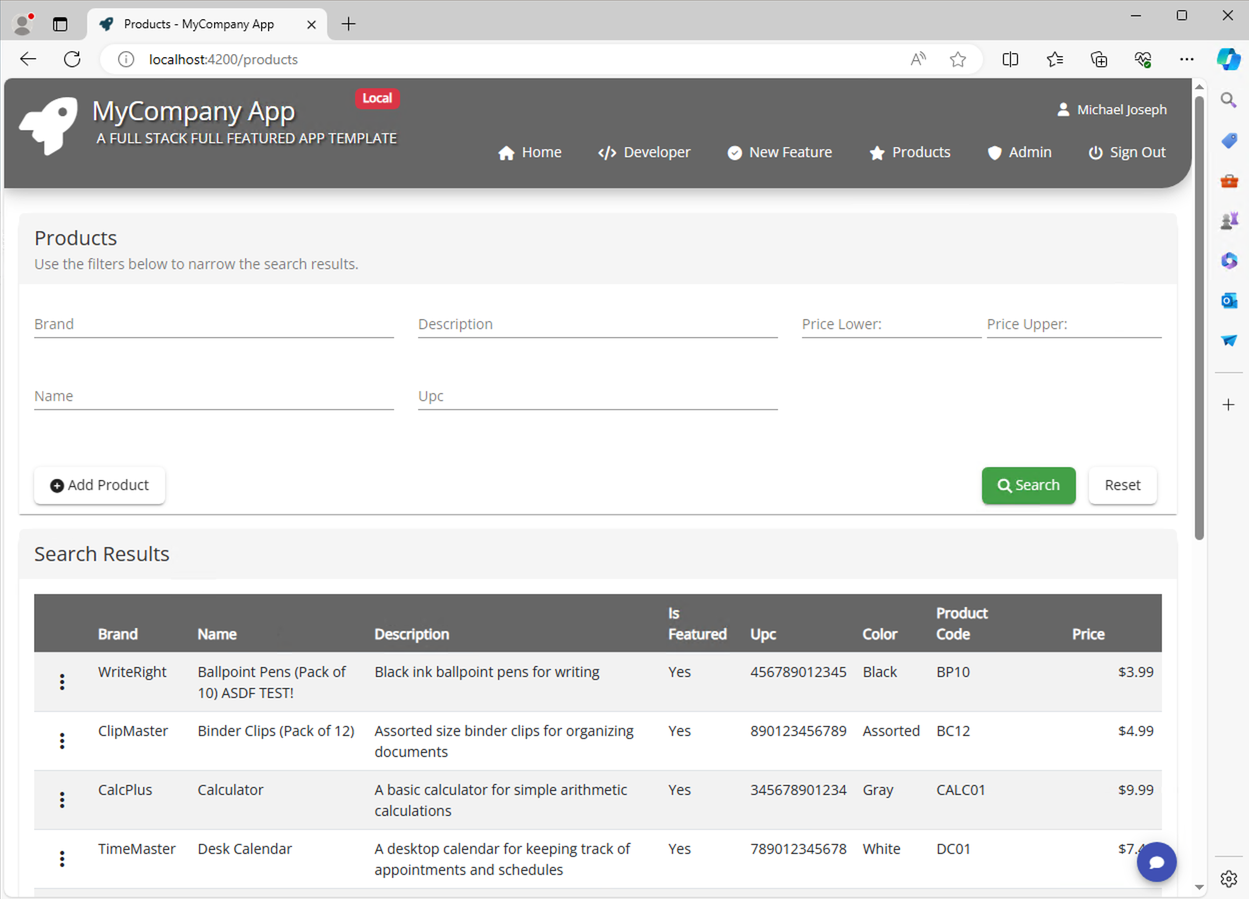
Upon clicking on that menu item, we'll be taken to the new products feature and we see live data!
Selecting edit on our first result brings up an edit form
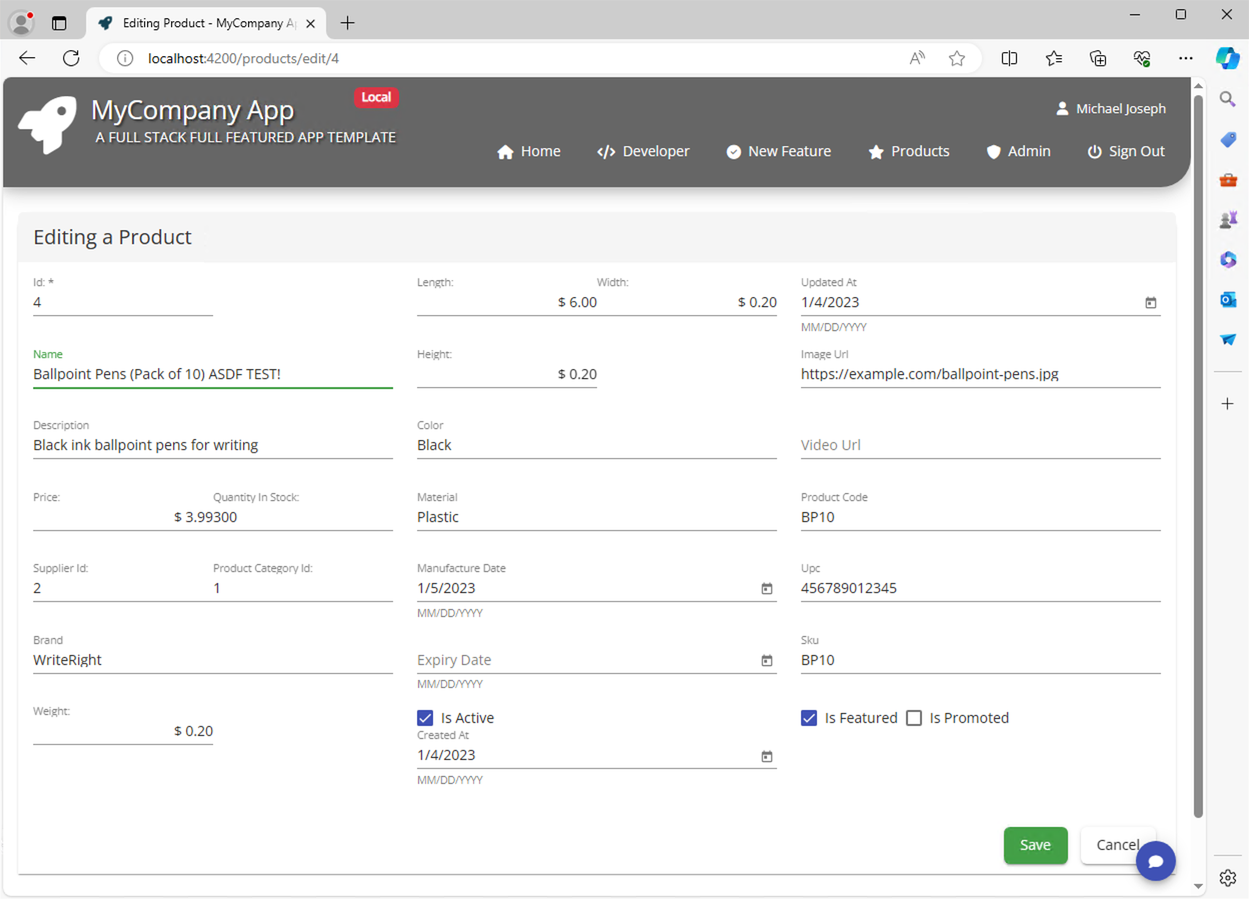
Notice how I changed the Name of the product by adding "ASDF TEST!" to the end of the name field and the price field for practice and I see the change reflected after saving the change. Here's how it looks after I pressed save:
All this was done without any coding. You'll notice there are some Supplier and Product Category Id fields that need to be wired up to foreign entities. I placed some commented code in the template output to serve as a starting point, but is otherwise back in the hands of a developer to implement.