This guide is intended to walk you through setting up the Octopus Deploy portion of an on-premesis hosted automated deployment pipeline.
This guide is in draft form. I am writing the first part of this guide mostly from memory so YRMV.
Before configuring your app deployment, you'll need to configure the infrastructure on your Octopus server and deployment targets.
On each machine that will host an environment, install the Octopus Tentacle. Setup as a listening tentacle and paste the thumbprint of your Octopus server. This can be found in the Octopus Settings (gear icon in upper left of Octopus menu) and "Configuration" and "Thumbprint". You may need to setup firewall rules to allow your tentacles to listen on port 10933 (default).
For each environment, you will need to set up at least one deployment target. For this example, there is a one-to-one relationship between environments, listening tentacles and deployment targets. Repeat this process for each deployment target:
webserver.In order for TeamCity to push packages and create releases in Octopus, you must configure Octopus to allow for it by:
TeamCity.TeamCity user account. This will give TeamCity full access to interact with Octopus.Now that Octopus is set up, it's time to configure your app's deployment process.
First, we will need to create a new project named after your LymeStack instance name. For this documentation we will use the continued example named "MyCompany". Go to the "Projects" menu in Octopus and enter MyCompany for the company name and optionally "Use version control for this project" (requires some git know-how).
There are a few steps involved in this process.
First we will configure the process to deploy the API to the IIS web application.
Deploy Web API.webserver.Octopus Server (built-in) option.MyCompanyApi.IIS Web Application option.MyCompany./api.Package installation directory should already be selected.MyCompanyApi.No Managed Code option.iis and then the password for the account. I usually keep the iis user account passowrd the same on both the devops (UAT) server as well as production server. NOTE: If you are using source control to store your Octopus configuration, you will need to store the password in a sensitive Octpus variable when you are setting up project variables. In this case, I would specify the value #{IisAppPoolPassword} and setup a project variable named IisAppPoolPassword containing the sensitve password value there.appsettings.json.Next we will configure the process to deploy the Angular app to the IIS web application.
Deploy Angular App.webserver.Octopus Server (built-in) option.MyCompanyAngularApp.IIS Web Application option.MyCompany./app.Package installation directory should already be selected.MyCompanyApi.No Managed Code option.Application Pool Identity option.Next we will configure the process to deploy the console app that will be used to execute the DbUp Database Upgrade.
Deploy a Package.webserver.Octopus Server (built-in) option.MyCompany.DbUp.appsettings.json.In order to make database changes as part of a deployment, LymeStack prefers DbUp. We will make use of the "MyCompany.DbUp" project in the "MyCompanyApi" Visual Studio solution.
Run DbUp Database Upgrade.## Configuration Variables:
$releaseNumber = $OctopusParameters["Octopus.Release.Number"]
Write-Host "`$releaseNumber: $releaseNumber"
$appDirectory = $OctopusParameters["Octopus.Tentacle.Agent.ApplicationDirectoryPath"]
Write-Host "`$appDirectory: $appDirectory"
$projectName = "MyCompany.DbUp"
Write-Host "`$projectName: $projectName"
$environmentName = $OctopusParameters["Octopus.Environment.Name"]
Write-Host "`$environmentName: $environmentName"
$baseDir = "$appDirectory\$environmentName\$projectName\$releaseNumber"
Write-Host "`$baseDir: $baseDir"
$escapedText = $baseDir.replace('\', '\\')
Write-Host "`$escapedText: $escapedText"
$scriptsFolderPath = "$escapedText\\Scripts"
Write-Host "`$scriptsFolderPath: $scriptsFolderPath"
$exePath = "$baseDir\$projectName.exe"
Write-Host "`$exePath: $exePath"
Write-Host "`$DbUpDatabasePassword: $DbUpDatabasePassword"
Write-Host "------------------------------------------------------"
Write-Host "Running DbUp... $exePath $scriptsFolderPath $DbUpDatabasePassword"
& $exePath $scriptsFolderPath $DbUpDatabasePassword | Write-Host
Write-Host "Done Running DbUp..."
webserver.In SSMS, execute this script on the SQLEXPRESS insteance of each environment's SQL Server. Remember to specify a secure password and store that password in a secure location for reference when setting up future deployments.:
USE master;
GO

-- Check if the login already exists; if not, create it
IF NOT EXISTS (SELECT * FROM sys.server_principals WHERE name = 'dbup')
BEGIN
    CREATE LOGIN dbup WITH PASSWORD = 'SPECIFYASECUREPASSWORDHERE';
    PRINT 'Login dbup created.';
END
ELSE
BEGIN
    PRINT 'Login dbup already exists.';
END
GO

-- Switch to the target database
USE MyCompany;
GO

-- Check if the user already exists in the target database; if not, create it
IF NOT EXISTS (SELECT * FROM sys.database_principals WHERE name = 'dbup')
BEGIN
    CREATE USER dbup FOR LOGIN dbup
    PRINT 'User dbup created in MyCompany database.'
END
ELSE
BEGIN
    PRINT 'User dbup already exists in MyCompany database.'
END
GO

-- Check if the user is already a member of the db_owner role; if not, add them
IF NOT EXISTS (
    SELECT dp.name
    FROM sys.database_role_members AS drm
    JOIN sys.database_principals AS dp ON drm.member_principal_id = dp.principal_id
    JOIN sys.database_principals AS rp ON drm.role_principal_id = rp.principal_id
    WHERE rp.name = 'db_owner' AND dp.name = 'dbup'
)
BEGIN
    ALTER ROLE db_owner ADD MEMBER dbup;
    PRINT 'User dbup added to db_owner role in MyCompany database.'
END
ELSE
BEGIN
    PRINT 'User dbup is already a member of db_owner role in MyCompany database.'
END
GO
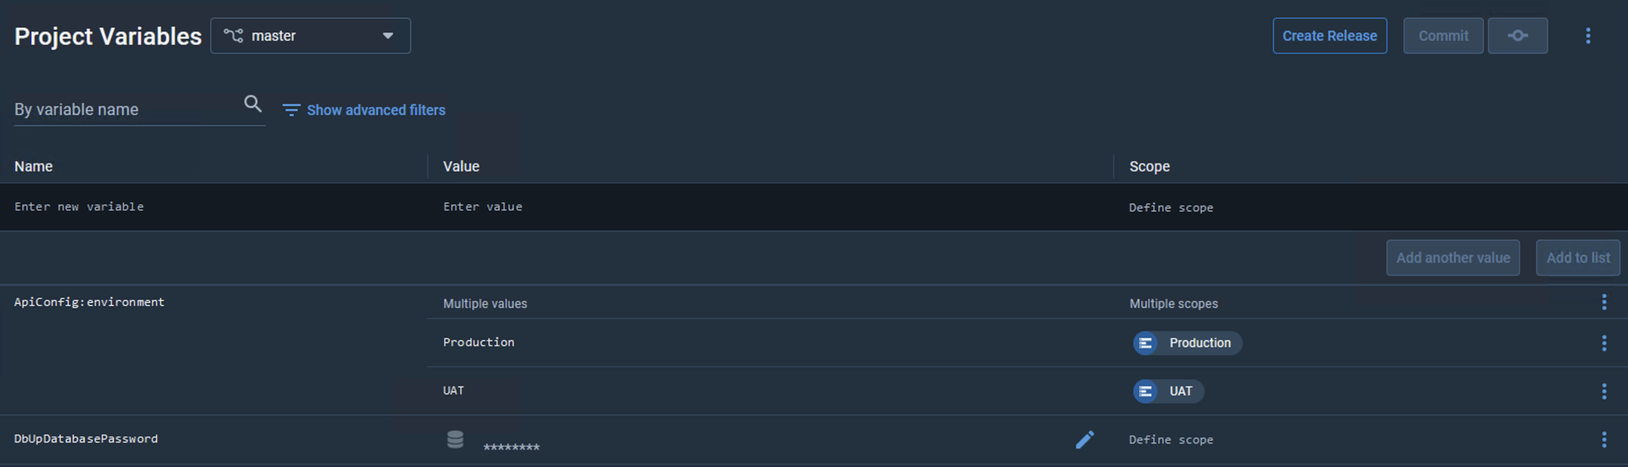
Project variables are perhaps one of Octopus's most valuable and powerful features. It allows Octopus to specify overriding values in configuration files for differing environments. LymeStack only requires one variable to be defined in its default set up, but this area will probably be more heavily used in the production environment when it comes to this such as SMTP settings, payment processing keys or any other API keys used to integrate with third party services.
At minimum, the ApiConfig:environment variable must be defined. The value for that variable should match the environment name.
Also, add the DbUpDatabasePassword variable as a sensitive variable to hide the value of the password. Specify the value as the password you edited in the script above.
Here's a screenshot of my configuration variables as an example:
Next, you are ready to Configure TeamCity.